

SMART FILM INSTALLATION
INSTRUCTIONAL VIDEO
REQUIRED BASIC EQUIPMENT
FOR THE INSTALLATION


-
Window scraper/razor
-
Nitrile gloves
-
Glass cleaner
-
Isopropyl alcohol
-
Microfiber towels
-
Liquid glass polish (optional)
-
18 Gauge Electrical wires
-
Neutral glass silicone (Silglaze or similar)
-
Microfiber towels
-
Squeegee
-
Wire stripper
-
Soldering iron
-
Lead free solder
-
Trim of your choice (non-conductive)
Do NOT use water or any other liquids for installation other than for cleaning beforehand. Installation surface must be clean and dry.
We recommend the outer dimensions of the film be 1/8" shorter than the glass around all edges.
The electrical contact strip and leads should NEVER come into contact with any metal frame, trim, or surrounding objects. The finished trim should be non conductive. Always ensure the completed project is trimmed with non conductive materials and that all exposed wires, leads, etc. are covered sufficiently to eliminate the possibility of electrical shock or fire. We are not responsible for improper installations and highly recommend professional installation.
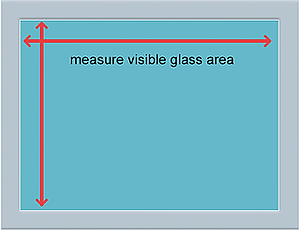
Provide us the width and height
we will confirm the pre-wiring location
after payment is received

Allow a minimum 1/8' installation tolerance
BETWEEN PRIVACY FILMTM AND
WINDOW FRAME
(1/8' = 3.175 mm)

Installation


Take off 20 to 30mm of the protecting layer from the "stick" side of the film and stick the film onto glass surface. As you take off the protecting layer, you can apply the film and use a vinyl scraper to get rid of air bubbles. Do not remove the whole protection layer before applying the film on the glass.
[The film itself comes with an electrostatic absorption layer on the stick side film. You cannot use any water or chemical materials for installation. Chemicals or water can damage the electrostatic layer resulting on the non- adhesiveness of the film on the glass].
After the sticking is done properly, connect the wires from the copper connector parts by soldering with iron. Then strip off the protecting plastic layer on the other side of the film by using an adhesive tape on the surface. Connect the controllers by strictly following the wiring connection diagram and then test.
You can use a Plastic or other Insulation materials to protect the copper connector parts. For all edges, we strongly suggest to apply a very thin layer of non conductive glass silicone or a 3M glue tape for protection. If not, the edges of the film may delaminate with time.
Notification
-
Don't use water or any other chemicals to wash, install or touching the edges of the film.
-
The Smart film should be 2 - 3 mm shorter than the glass to avoid a direct contact with the frame.
-
Strictly follow the wiring connection guide we offer before testing the film. If any problems arises from a high voltage, it will not be under warranty.
-
Strictly use the silicone required to avoid the delamination of the smart film.
-
Smart Film Standard Wiring Diagram
Smart Film Wireless Wiring Diagram
WARNING - Do not substitute a higher fuse rating! Fuse rating is critical to properly protect Smart Privacy Film panels and the transformer.
Note
-
The Customer must make themselves fully cognizant of the Manufacturer's TECHNICAL INFORMATION & INSTALLATION GUIDE prior to the installation of the Product.
-
If the Product is to be subjected to prolonged, excessive exposure to heat - particularly direct sunlight, the Customer should consider that the Product be constructed with Low E glass. Otherwise, such a situation could be deleterious to the PDLC film and may render the warranty null and void.
-
If the Product is intended to be installed where it will be subjected to excessive moisture (wet glazing) then it is imperative that all the edges of the Product be properly sealed prior to framing with the appropriate tape and non- acetic, neutral silicon sealant as stipulated in the Manufacturer's TECHNICAL INFORMATION & INSTALLATION GUIDE. Failure to comply with this will render this warranty null and void.
-
Photos of the before / after and during installation must be provided to warranty@smartglasstech.com within 14 days of installation completion. A 30 second video clip of the project in both operating modes must also be provided.
-
PLEASE NOTE: ALL WARRANTIES ARE VOID IF MATERIAL IS CUT OR TRIMMED BY ANYONE OTHER THAN AN AUTHORIZED PROVIDER / INSTALLER OR FACTORY DIRECT.

Clean the glass until is very clean, without any impurity and make sure that the surrounding environment is very clean too. If the film or the glass is not clean enough, you may have some bubbles problem after installation.